 I have a large collection of DVDs (approaching 700, I think… someday I need to do an actual count). I used to have them all on a bookcase, alphabetized, of course. But now I have pulled them all onto a server and I use Plex to serve them up. With this setup, when I want to watch a DVD, the experience is more like using Netflix: I sit on the couch with my remote, browse through the list, and click on what I want to watch.
Plex is an awesome product and I highly recommend it. Here is my first post about Plex from back in 2015, which goes into detail on how to set it up, and also Plexopedia is a good resource for how-to tips.
But this post isn’t really about Plex, it is about MakeMKV: the program I use to rip DVDs so I can put the file into my Plex library. [Yes, the correct term for copying the files from a DVD is to “rip.”] There are other programs out there to do this, but every time I look around to make sure I’m using the best option, all signs point me to keep using this one.
That said, its user interface isn’t exactly intuitive. In fact, when I recently had occasion to rip a DVD after a few years of not doing so, I found that I no longer knew how and it took me a stupidly long time to figure it out. So in this post I will document those steps: not only for you, but for the next time I need to rip a disc after a long hiatus and need the reminder.
Here’s the MakeMKV page where you can download the program and see all they have to say. And here is a Reddit thread discussing MakeMKV and why it is a good choice for ripping DVDs.
I will begin these instructions assuming you have already downloaded, installed, and have opened the program. My instructions are for on the Mac, but I assume it won’t be too different on another platform.
Set up your target/destination folder
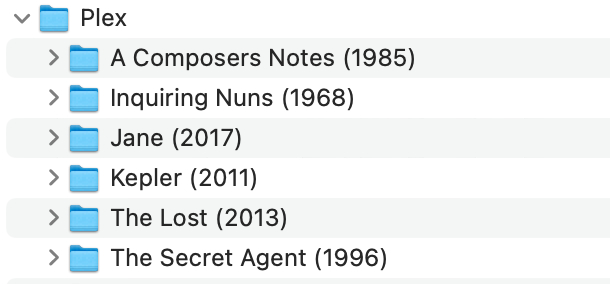
In your file system, go to the path where you will be storing your files and create a folder for the new content. The golden rule with Plex is that the folder (and file) names should have the title of the film with title-case and spaces followed by the release year in parentheses.
For this example, I will be ripping the film “Secret Agent,” which is part of my collection of films with a soundtrack by Philip Glass [with whom I am obsessed].
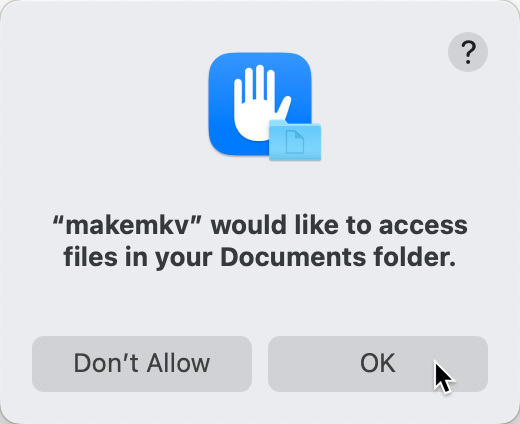
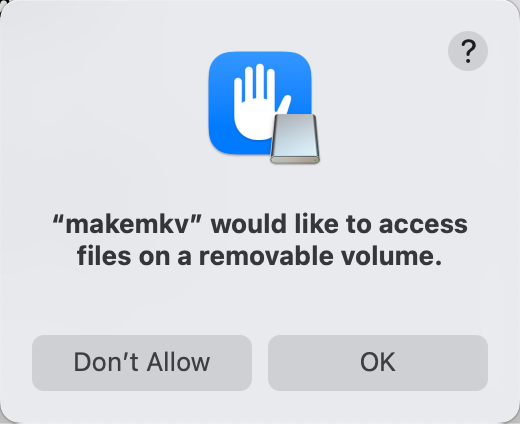
When you first open MakeMVV it will ask for your permission to access your files. Click OK. [Sometimes it will ask you this more than once.]
MakeMKV preferences
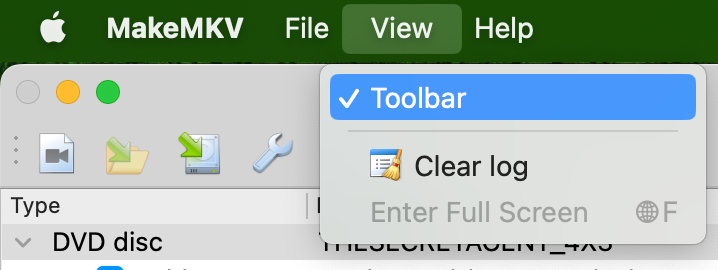
If this is your first time using MakeMKV then there are two preferences to set. First, make sure you see the toolbar (the buttons at the top-left). I think the program defaults to showing it, but in case you don’t see it, you can turn that on with the View menu:
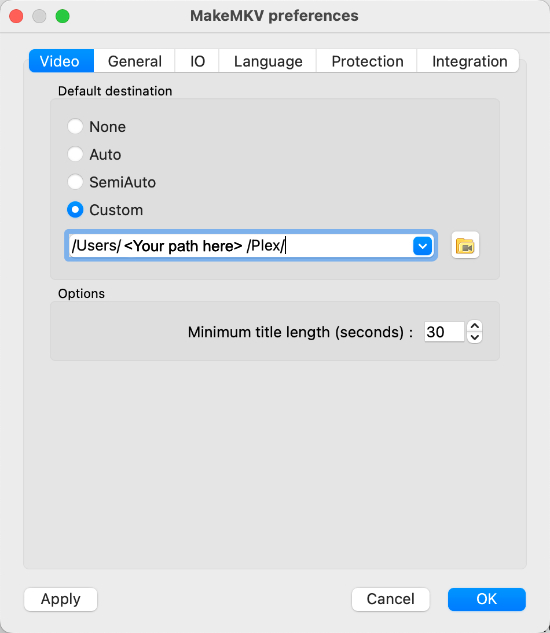
Next, set the default folder by choosing Preferences from the MakeMKV menu then going to the Video tab. Choose the top-level folder where all your plex movies are stored, not the folder you just made for the specific video you are ripping.) There are lots of other options in the preferences window that are a complete mystery to me.
Ripping your disc
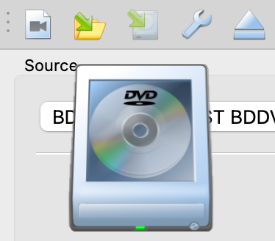
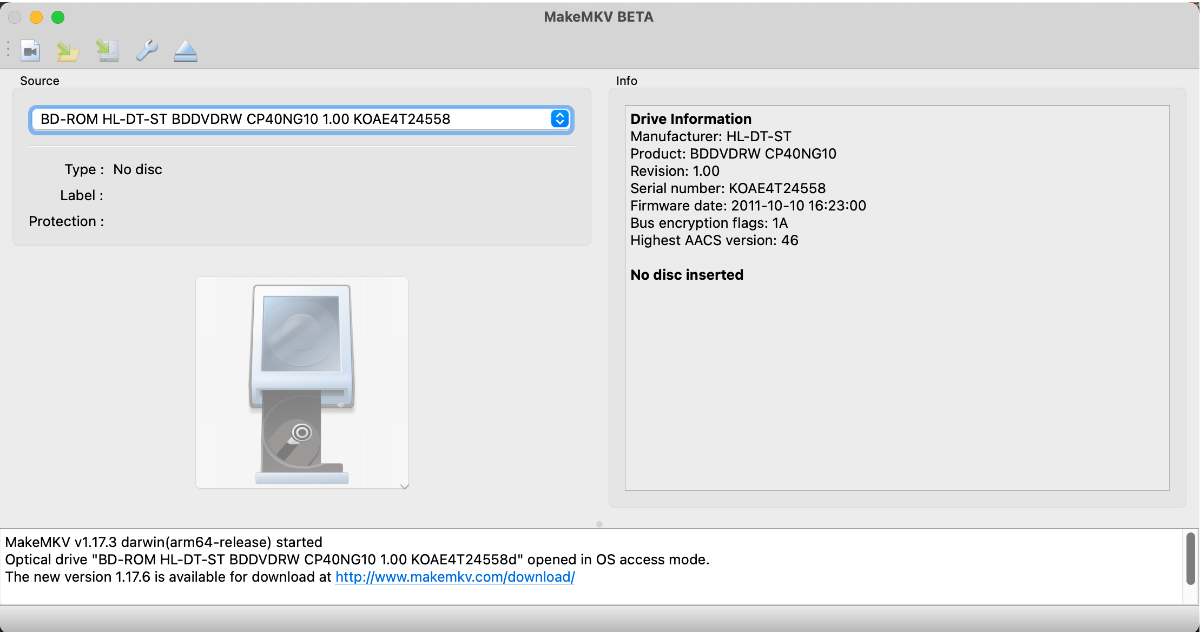
When you first run the program it will present the screen shown below. The icon of the DVD player will be open or closed depending on whether or not your device is open.
Put your disc in the drive, close it up, then the icon of the DVD player will animate while it loads. The time this takes depends on how much content is on the disc, but it usually only takes a few minutes. When it is finished it will add the name of the disc and protection type to the fields in the upper-left.
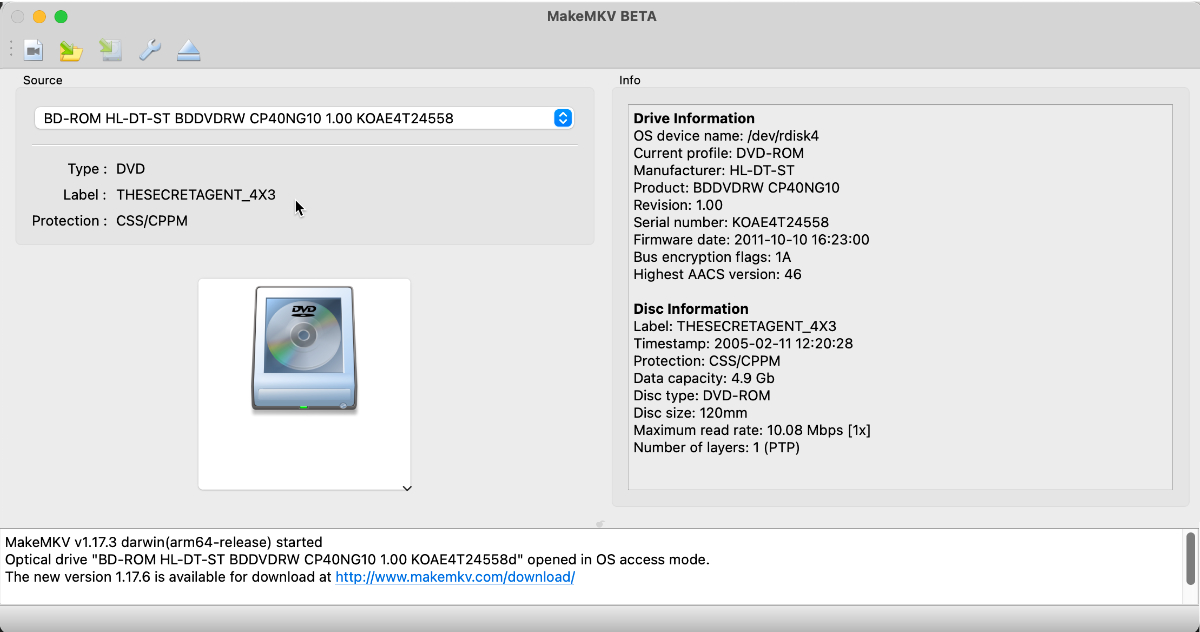
I have nothing to say about that Protection Type field. I have before run into a disc that I just could not rip, and it probably had to do with that — but this is very rare and sadly I took no notes about it.
Next, click on the icon of the DVD player. This will cause MakeMKV to read all the content on the disc, which usually doesn’t take too long. When finished it will list all the files, showing them as selected. If you only want the film and none of the bonus content, then unselect everything except the largest file. (However my motto is to rip all of the files.)
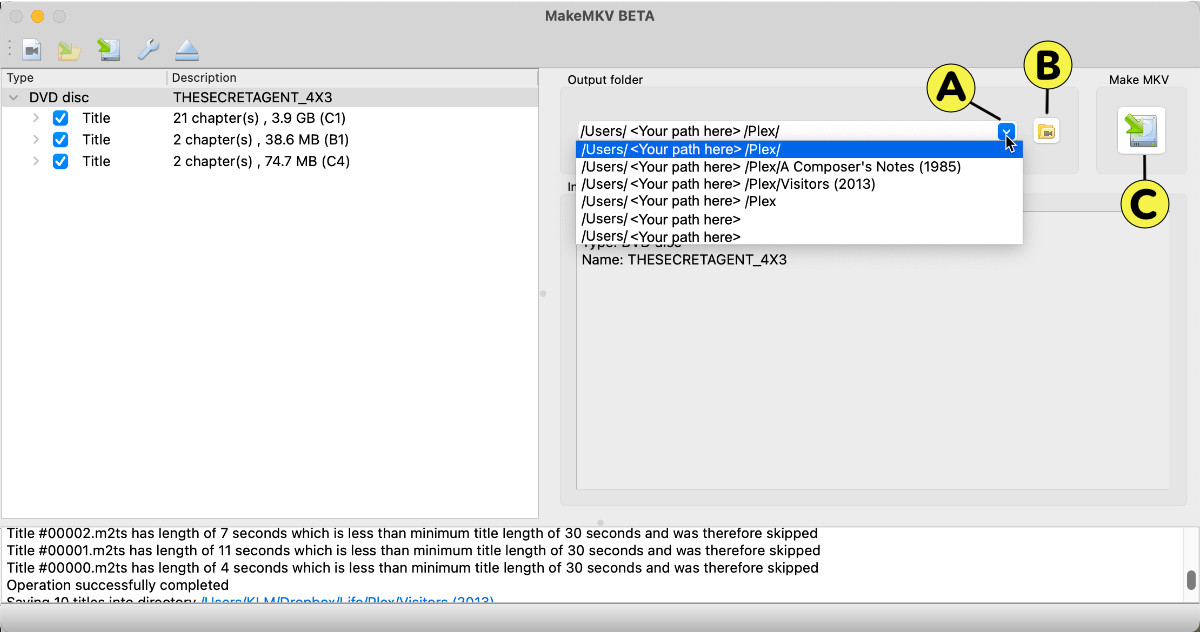
Next, if you are saving to a folder you have saved to before, then you can [sometimes] select the target folder from the dropdown (A), but you will more likely need to select the folder by clicking the folder icon (B). Once the folder is selected and displayed in the dropdown, then you are ready to go: Click the green-arrow icon (C) and the process will begin.
The system will ask for your permission to access the files on the disc:
Then it will start to save the content, and it will look something like this:
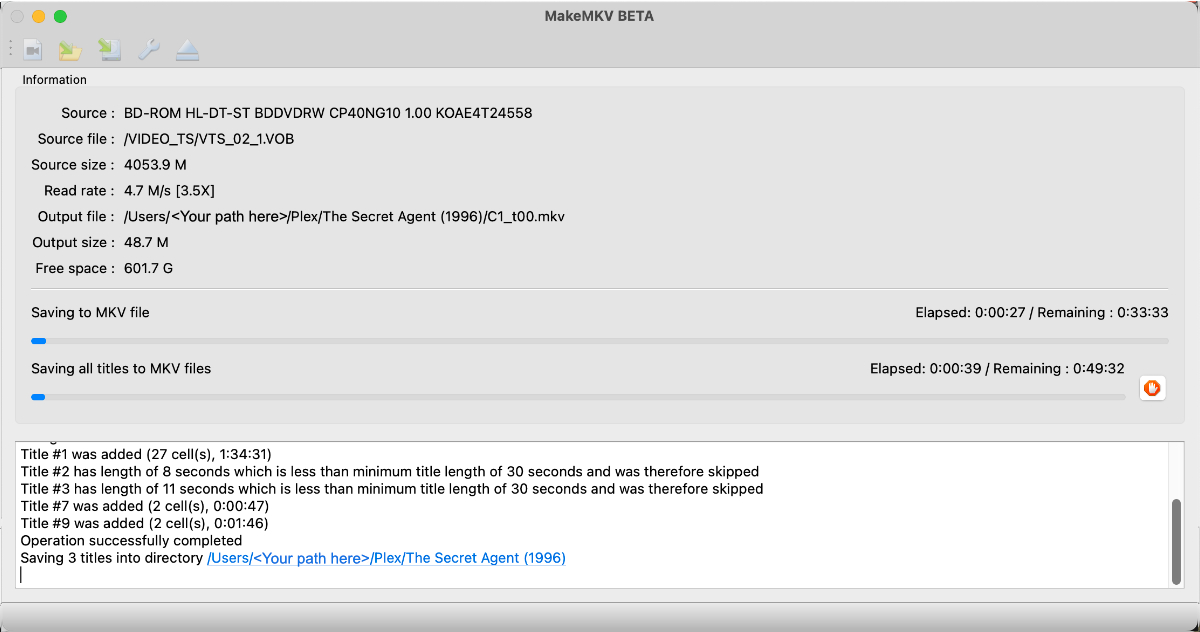
This will take a long time. If there is not much content on the disc or the film is short, this could take as little as 5-10 minutes. But for a longer film or a disc with a lot of bonus content, it could take 45 minutes or even more. Be patient. Go get a cup of coffee. Get some work done. Call your mom.
When finished it will display a message telling you how many files were copied:
Click OK, then click the Eject button in the toolbar in the upper-left to eject the disc: ![]()
Then either start the process over with a new disc or close the program.
Your files
MakeMKV will have written the files to the destination folder that you specified, but in order for these files to work well with Plex, you need to edit the file names. Below are my files as MakeMKV named them:

You can usually assume that the largest file is the actual film. Give it the exact same name as the folder, including the year in parentheses, and of course retaining the .mkv extension. As for the other files, the name will depend on what it is.
- For details about file and folder naming, including for films that are on multiple discs, see this Plex article.
- For information about naming extra content, such as behind-the-scene shorts, interviews, etc., see this Plex article, which tells you how to designate a file as one of these types:
-behindthescenes, -deleted, -featurette, -interview, -scene, -short, -trailer, -other - For information about changing the name of the film file to something other than the film’s official title, see the section Changing the film name, below.
Your final step is to move this folder onto your server, then your Plex system should automatically pull it in. However note that this is not immediate: it might take a few minutes, or hours, or even a full day before it shows up in your collection.
Changing the film name
The best practice is to name the file to match the name of the film, but there may be times that you want to modify that name, such as for films that begin with the word “The,” which are therefore alphabetized non intuitively. If I want to watch “The Cabin in the Woods,” I’ll scroll down my movie list in Plex to C and look for it there, but Plex puts all the “The…” movies in with the Ts. I can rename the file (and folder) to remove the word “The,” but Plex can get confused if the name isn’t an exact match for how it is listed in online databases, and so it might not be able to match a movie poster or other information to you file.
After a little searching, I found a solution in this Reddit thread. Here’s the gist: If you change the name of the file from the film’s official title, then you can include a code from the Internet Movie Database (IMDB) into the file name (but not the folder name) to guarantee a proper match.
To get the code, go to IMDB, search for your film, copy the code from the URL, then add the code to your file name in the form -{imdb-code}. For example:
- I search in IMDB for “The Cabin in the Woods,” and it results in this URL: https://www.imdb.com/title/tt1259521/
- Next, I edit the file name, removing “The” and adding the code. So I changed “The Cabin in the Woods (2012)” to instead be “Cabin in the Woods (2012)-{imdb-tt1259521}”.
- Finally, I edit the folder name to remove “The”. So I changed “The Cabin in the Woods (2012)” to instead be “Cabin in the Woods (2012)”.
This is all fine if you have a dozen or fewer films that you need to look up in IMDB, but I had over 90! Luckily for me I am married to a software engineer, who quickly put together a Python program to get the codes for me. [Huge thank you to my wonderful Dave for supplying all the rest of the content for this post!]
If you are comfortable with Python programming, here is a script that fetches the IMDb movie codes for a list of movie titles. The script requires the package cinemagoer, e.g.:
$ pip install cinemagoer
Put your list of movie names in a text file named “movie_titles.txt” using the Plex directory naming convention. The year in parentheses is sometimes optional but including the year will help the service resolve between movies of the same name. E.g.:
$ cat movie_titles.txt
The Man Who Wasn’t There (2001)
The Man with One Red Shoe (1985)
The Man with Two Brains (1983)
Then run the script (shown at the end of this post). If you named the script getcodes.py, then:
$ python ./getcodes.py
trying The Man Who Wasn’t There (2001)
trying The Man with One Red Shoe (1985)
trying The Man with Two Brains (1983)
IMDb codes have been written to imdb_codes.txt
The resulting codes will be found in imdb_codes.txt. E.g.:
$ cat imdb_codes.txt
The Man Who Wasn’t There (2001): tt0243133
The Man with One Red Shoe (1985): tt0089543
The Man with Two Brains (1983): tt0085894
Here is the script:
from imdb import IMDb
import sys

def get_imdb_codes(input_file, output_file):
    # Create an instance of the IMDb class
    ia = IMDb()

    # Read movie titles from the input file
    with open(input_file, 'r') as f:
        movie_titles = f.read().splitlines()

    # Open the output file
    with open(output_file, 'w') as f:
        # Process each movie title
        for title in movie_titles:
            print(f"trying {title}")
            try:
                # Search for the movie
                movies = ia.search_movie(title)

                if movies:
                    # Get the first result (most relevant)
                    movie = movies[0]

                    # Write the movie title and IMDb ID to the output file
                    f.write(f"{title}: tt{movie.movieID}\n")
                else:
                    f.write(f"{title}: Not found\n")
            except Exception as e:
                f.write(f"{title}: Error - {str(e)}\n")

    print(f"IMDb codes have been written to {output_file}")

input_file = 'movie_titles.txt'  # Your input file with movie titles
output_file = 'imdb_codes.txt'   # The output file where IMDb codes will be written

get_imdb_codes(input_file, output_file)